
Proper finger placement is the single habit that separates fast, accurate typists from slow ones who hunt and peck. When each finger is responsible for its own set of keys and always returns to the same starting position, your hands learn the keyboard by feel, your eyes stay on the screen, and your speed climbs on its own. This guide shows exactly where every finger goes, with clear diagrams you can follow along on your own keyboard.
The home row: your starting position
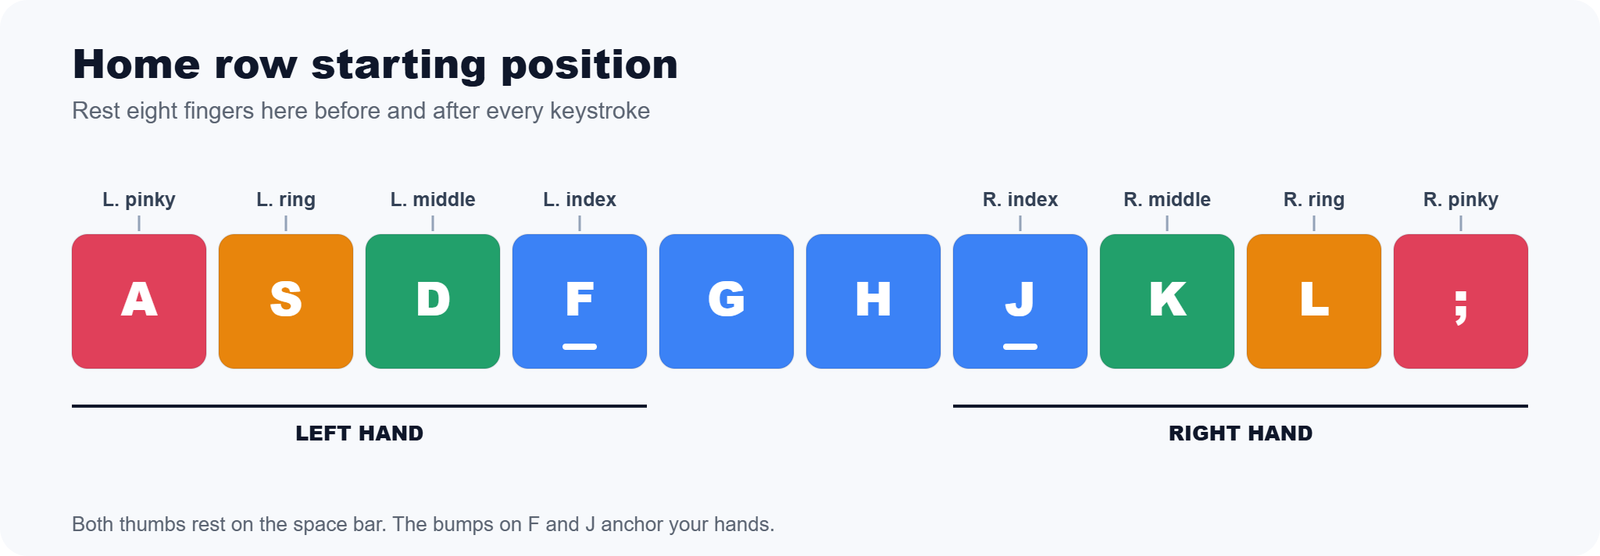
Every touch typist starts and ends on the home row, the middle row of letters. Rest your left fingers on A, S, D and F, and your right fingers on J, K, L and the semicolon. Both thumbs rest lightly on the space bar. The F and J keys carry a small raised bump so you can find this position without looking down.
See it: fingers resting on the keys
Here is the same starting position shown as two hands on the keyboard. Notice how each fingertip sits on its own key, the hands stay relaxed and slightly apart, and both thumbs hover over the space bar. This is the exact position you return to after pressing any key.
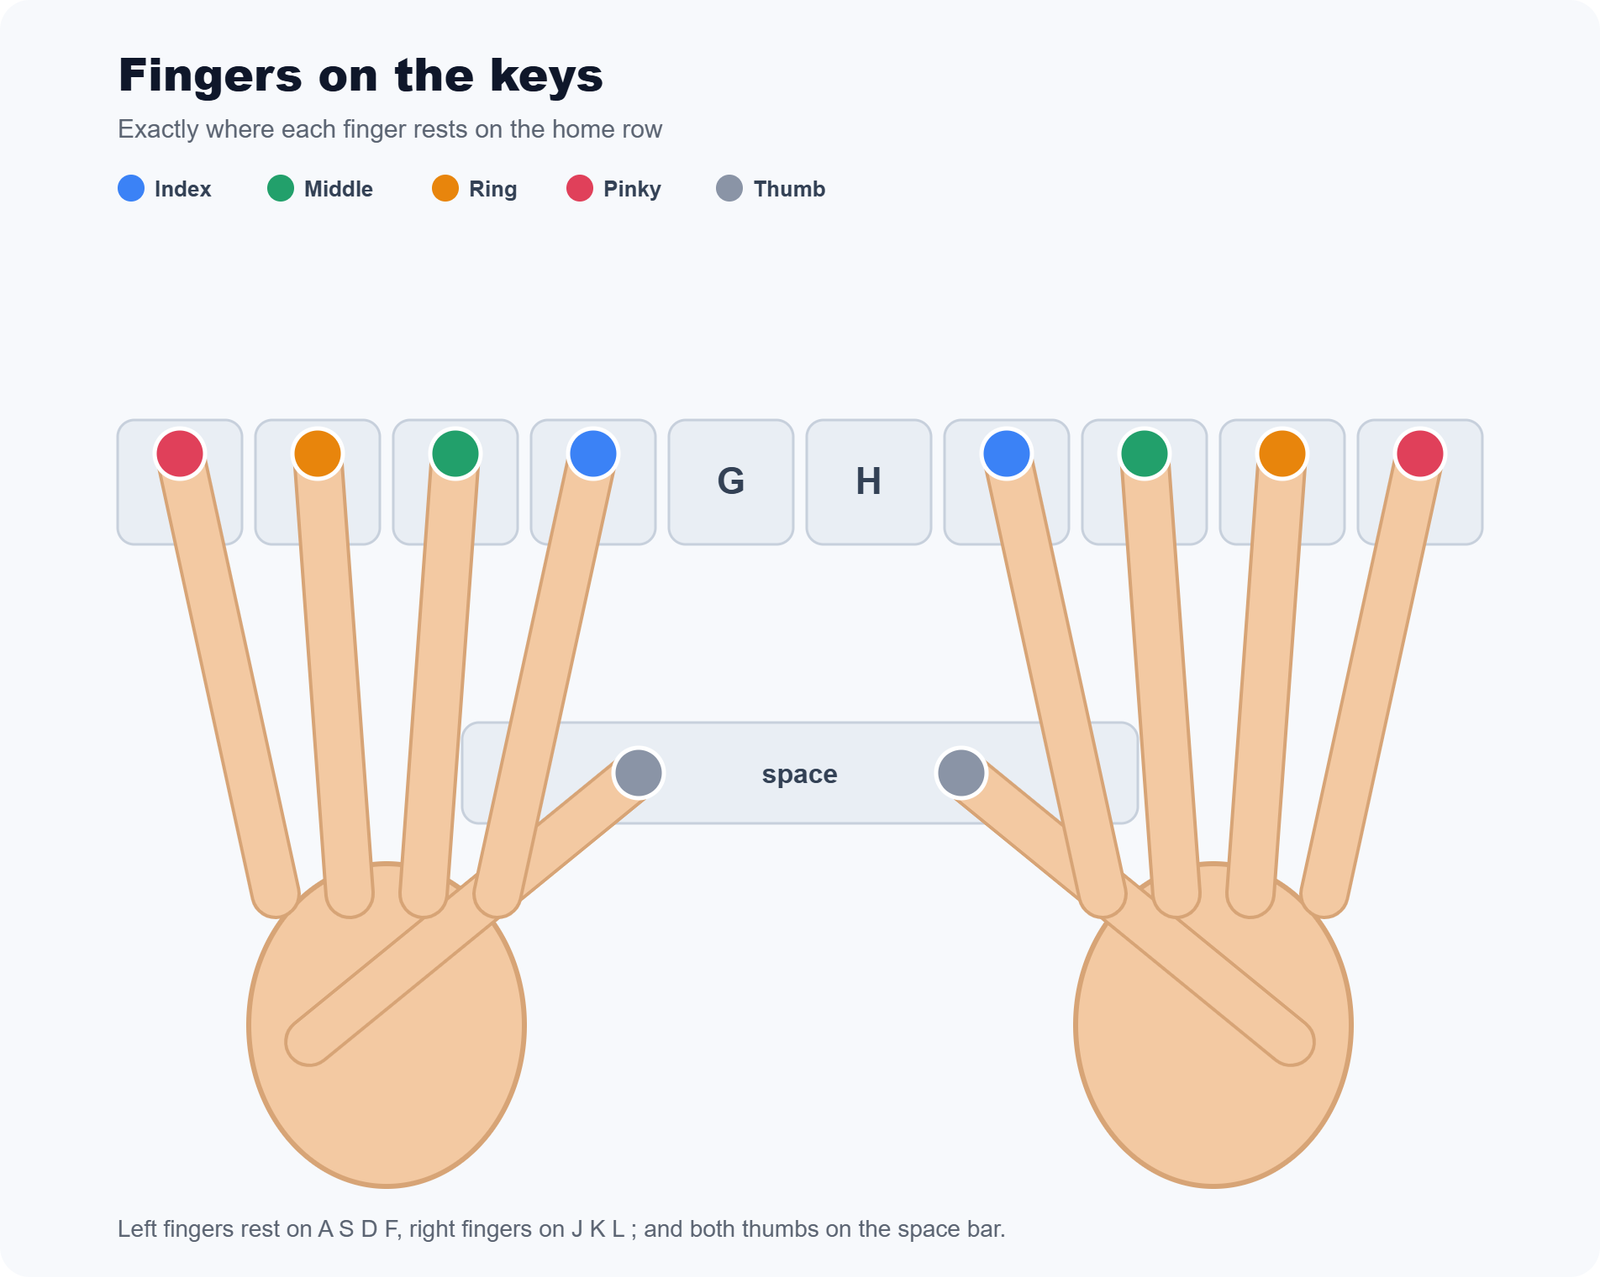
- Left hand: little finger on A, ring finger on S, middle finger on D, index finger on F.
- Right hand: index finger on J, middle finger on K, ring finger on L, little finger on the semicolon.
- Both thumbs rest lightly on the space bar.
Which finger types which key
From the home row, each finger reaches to the keys directly above and below its home key, then returns. The chart below is colour coded by finger so you can see the whole keyboard at a glance: index fingers are blue, middle fingers green, ring fingers orange, the little (pinky) fingers red, and the thumbs grey for the space bar.
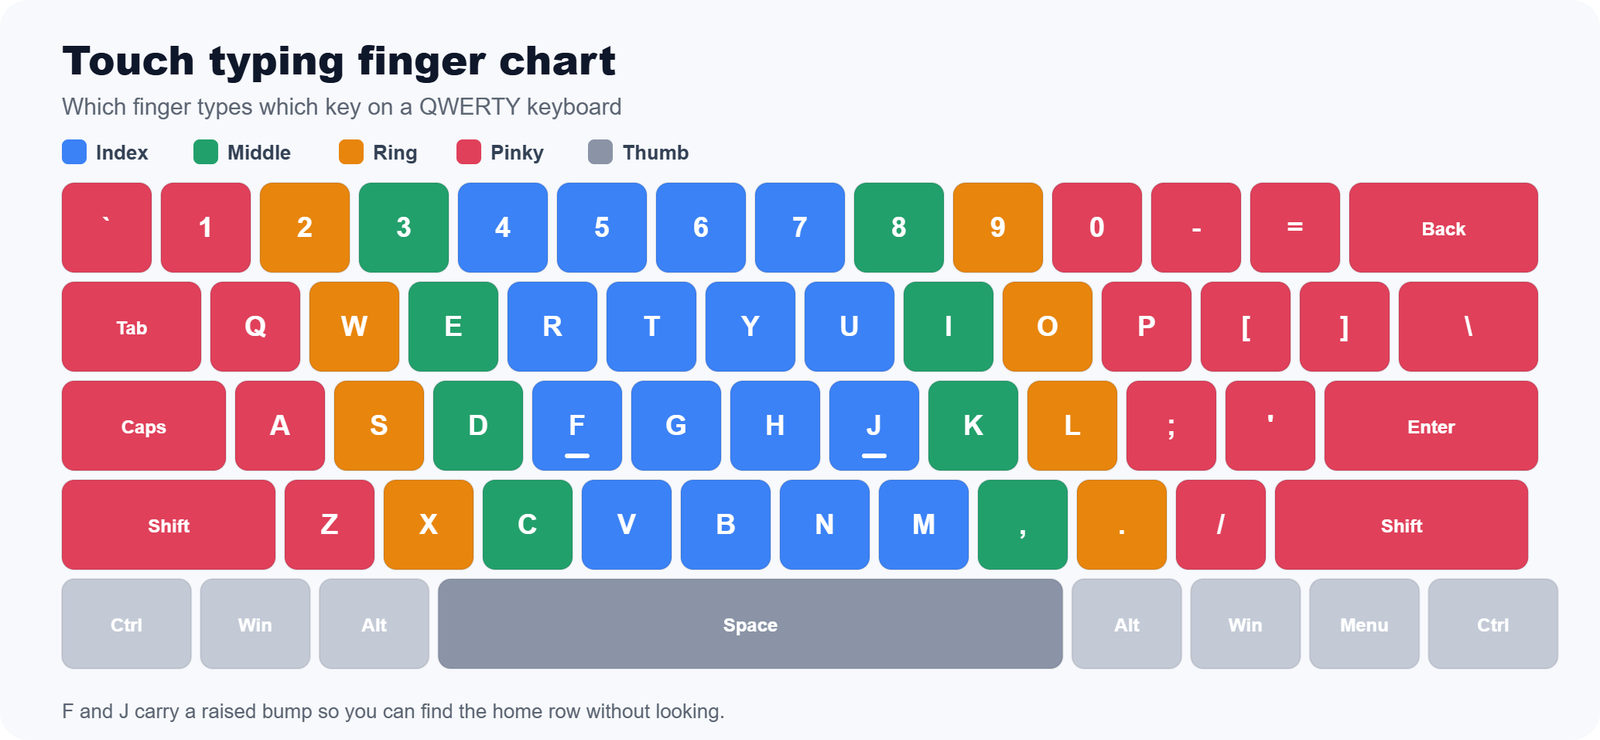
A few zones are worth memorising. Your index fingers do the most work: the left index covers R, T, F, G, V and B, and the right index covers Y, U, H, J, N and M. The middle, ring and little fingers each take the column above and below their home key, and the little fingers stretch out to the punctuation, Enter, Shift and Backspace on the edges.
The rules that make it work
- Always return home. After every keystroke, bring the finger straight back to its home key so your hands never drift.
- Use the opposite hand for Shift. For a capital letter typed with the left hand, hold the right Shift, and the other way around. Using the same hand for both forces an awkward stretch.
- Do not look down. Trust the F and J bumps to find your place. Looking at the keyboard is the habit that keeps most people slow.
- Keep it light. Relax your wrists, keep your forearms roughly level with the keyboard, and press keys gently rather than pounding them.
How to practise proper finger placement
Knowing where the fingers go is the easy part; building the muscle memory takes short, regular practice. Start with our guided typing lessons, which begin on the home row and add new keys one finger at a time. When you are ready to measure your progress, take a free typing test, and let us build you a personalised practice plan around the keys that slow you down.
A final note on comfort: the posture guidance here is practical advice, not medical advice. If you feel pain or a persistent problem in your hands, wrists or arms, stop and speak to a qualified professional.